Steps
STEP 1
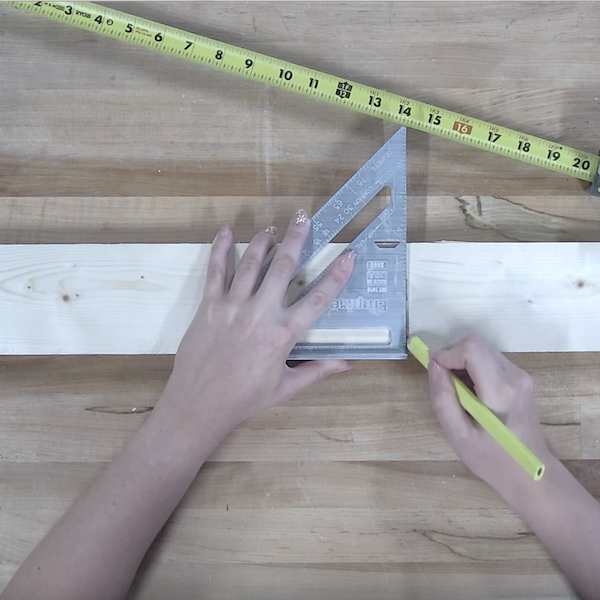
Measure and mark cut lines for (2) 1"x10"x11", (1) 1"x10"x18-3/4", and (3) 1"x4"x18-3/4."
Tools
Materials
![Measuring wood marks](https://2e1293630802db8d0d56-50fcdb1c10e3e49a3d1b0541a2f13b69.ssl.cf1.rackcdn.com/projects/steps/ca250ec901004a6b960e14e1a2322428.png)
STEP 2
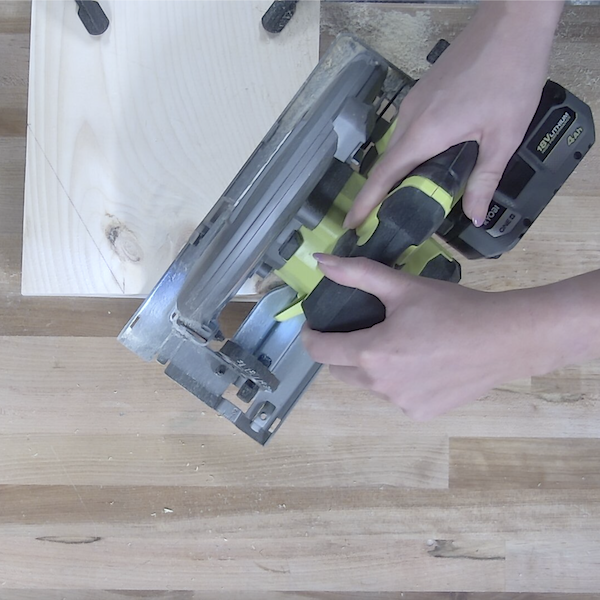
Make the wood cuts according to the lines marked in the first step.
Tools
![Cutting wood to size](https://2e1293630802db8d0d56-50fcdb1c10e3e49a3d1b0541a2f13b69.ssl.cf1.rackcdn.com/projects/steps/79f2b42783d742e3b959ef69b491b040.png)
STEP 3
On the 2 side pieces (1"x10"x11"), cut an angle by cutting along a diagonal from 5-1/2" on the side to 3-3/8" on the top on both sides.
Tools
Materials
![Cutting wood angle](https://2e1293630802db8d0d56-50fcdb1c10e3e49a3d1b0541a2f13b69.ssl.cf1.rackcdn.com/projects/steps/6b92b07648604d4086c2662eaf8e79f7.png)
STEP 4
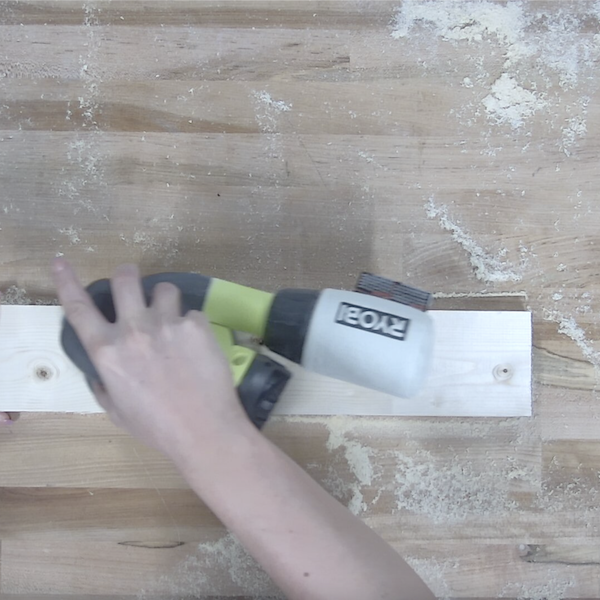
Sand all of the pieces of wood in preparation for staining.
Tools
Materials
![Sanding wood](https://2e1293630802db8d0d56-50fcdb1c10e3e49a3d1b0541a2f13b69.ssl.cf1.rackcdn.com/projects/steps/93cf3b3147f8494fab4bfdac0edfffa0.png)
STEP 5
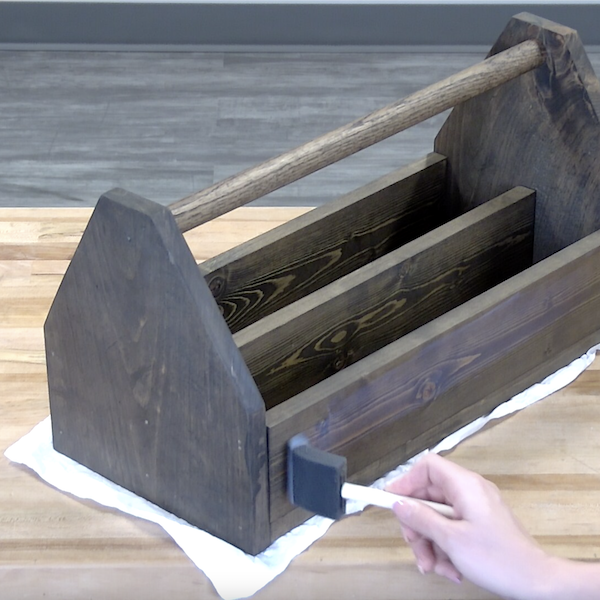
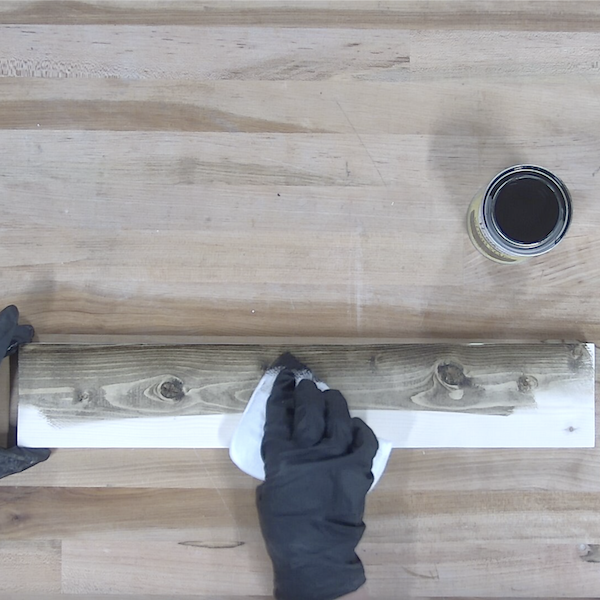
Apply stain to all of the pieces. Allow 24 hours to dry.
Materials
![Apply stain to the wood](https://2e1293630802db8d0d56-50fcdb1c10e3e49a3d1b0541a2f13b69.ssl.cf1.rackcdn.com/projects/steps/8ca6a78f4f36450d9bd23d589332f200.png)
STEP 6
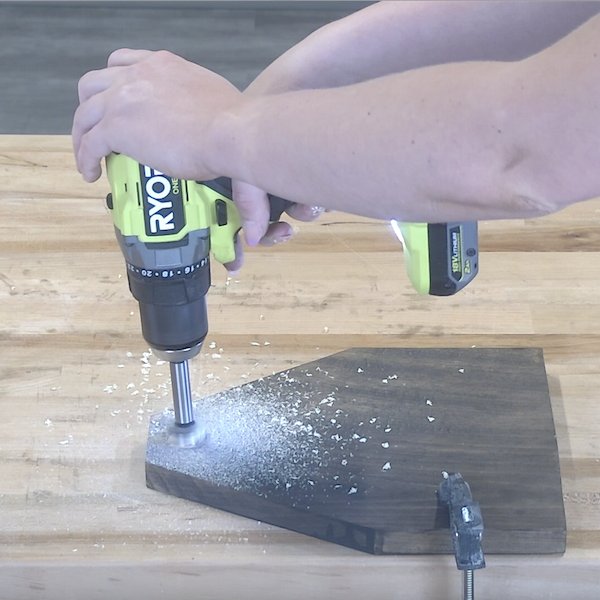
Drill a 1/2" deep hole about an inch down on the inside of the (2) 1"x10"x11" side pieces using a 1" Bit
Tools
Materials
![Drilling bit into the wood](https://2e1293630802db8d0d56-50fcdb1c10e3e49a3d1b0541a2f13b69.ssl.cf1.rackcdn.com/projects/steps/3c078f46fa03475da770c98807e965f0.png)
STEP 7
Construct the base by attaching the (3) 1"x4"x18-3/4" divider pieces on top of the 1"x10"x18-3/4" bottom piece. Attach one of the dividers in the middle of the bottom piece, then attach the other two on the front and back of the bottom piece
![Nailing the base together](https://2e1293630802db8d0d56-50fcdb1c10e3e49a3d1b0541a2f13b69.ssl.cf1.rackcdn.com/projects/steps/ddfc40e56ca344a291be82a314002962.png)
STEP 8
Line up the two side pieces with the sides of the base. Line up the dowel where the circles have been made. Measure out the length between the two sides and cut to size.
Tools
Materials
![Brad Nailer](https://2e1293630802db8d0d56-50fcdb1c10e3e49a3d1b0541a2f13b69.ssl.cf1.rackcdn.com/projects/steps/f14eb576b8cc4301957f861357b9a190.png)
STEP 9
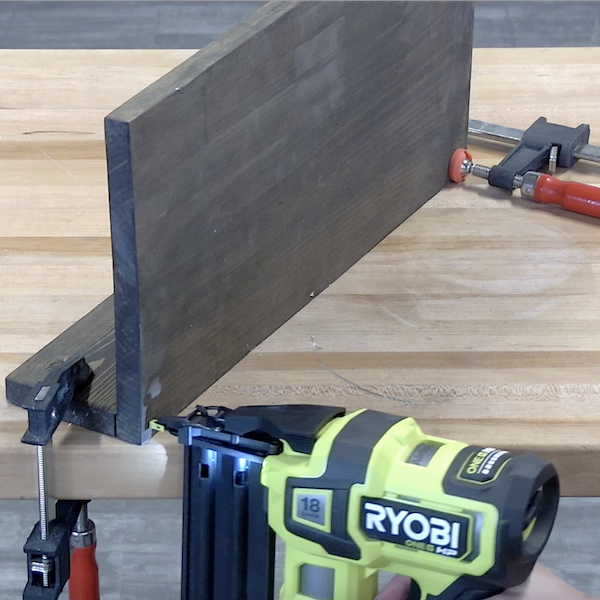
Line up the two sides with the base and insert the dowel into each circle. Nail each piece into place
Tools
Materials
![Nailing the dowel into place](https://2e1293630802db8d0d56-50fcdb1c10e3e49a3d1b0541a2f13b69.ssl.cf1.rackcdn.com/projects/steps/05f3228ee42547aea646f04c526d62b7.png)
STEP 10
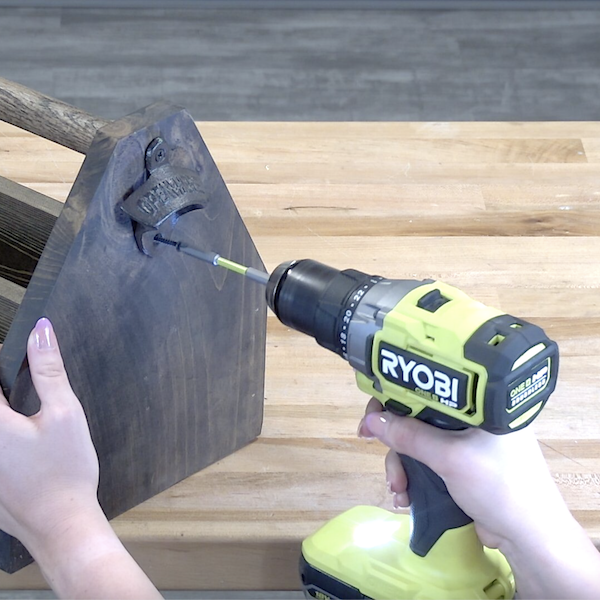
Attach the bottle opener on one of the sides of the caddy using the included screws.
Tools
Materials
![Drilling in bottle opener](https://2e1293630802db8d0d56-50fcdb1c10e3e49a3d1b0541a2f13b69.ssl.cf1.rackcdn.com/projects/steps/2c16aeedc50b4872b502537f724f4bb1.png)
STEP 11
Apply the polyurethane all over the BBQ Caddy to seal the stain. Allow at least 24 hours to cure.
Materials
![Applying polyurethane](https://2e1293630802db8d0d56-50fcdb1c10e3e49a3d1b0541a2f13b69.ssl.cf1.rackcdn.com/projects/steps/ff54b64222a04960a91841db1c68fb8c.png)