Steps
Step 1
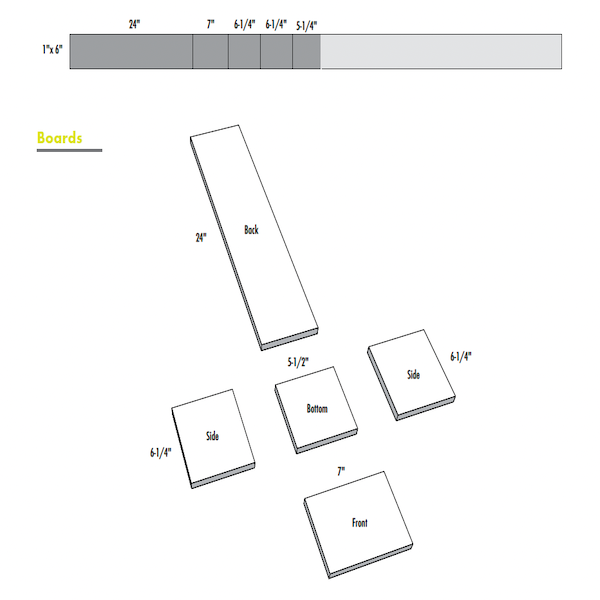
Cut out all material using the Lumber & Cut Layout Guide.
Tools
Miter Saw, Tape Measure
Materials
1" x 6" x 8' Wood Board
![Step 1](https://2e1293630802db8d0d56-50fcdb1c10e3e49a3d1b0541a2f13b69.ssl.cf1.rackcdn.com/projects/steps/744b4aaaa754482ab8fa5b7b4e14c30c.png)
Step 2
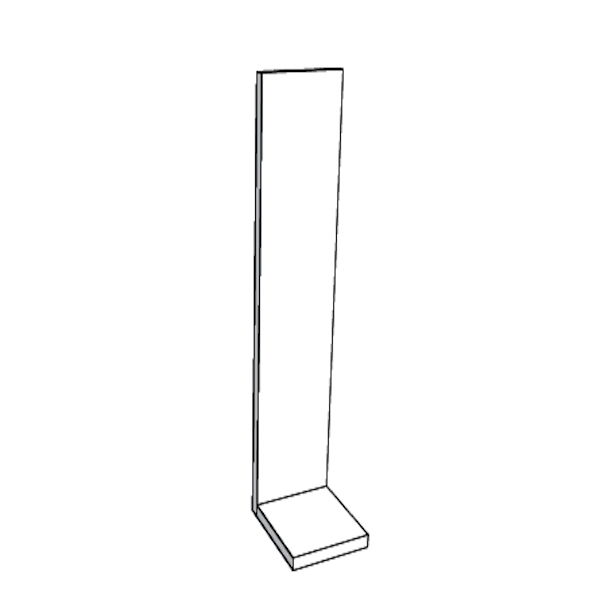
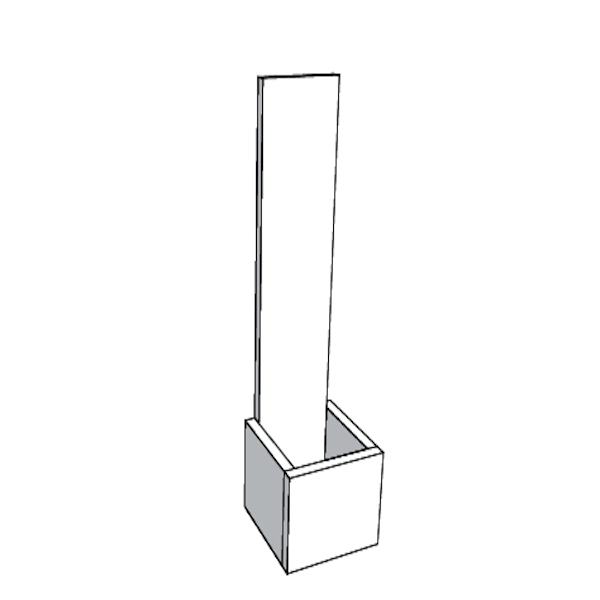
Align the edge of the bottom board to the back board. Glue and nail together.
Tools
Brad Nailer
Materials
Wood Glue, 1-1/2" x 18-Gauge Collated Nails
![Step 2](https://2e1293630802db8d0d56-50fcdb1c10e3e49a3d1b0541a2f13b69.ssl.cf1.rackcdn.com/projects/steps/d0eb40b555884a10af86279630667a44.png)
Step 3
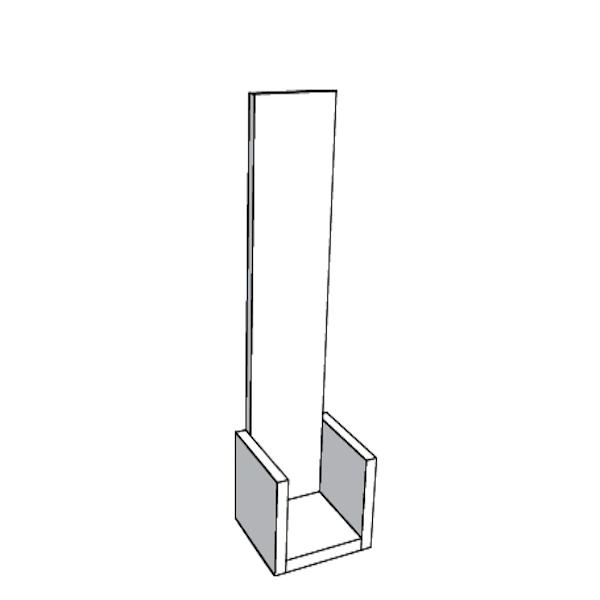
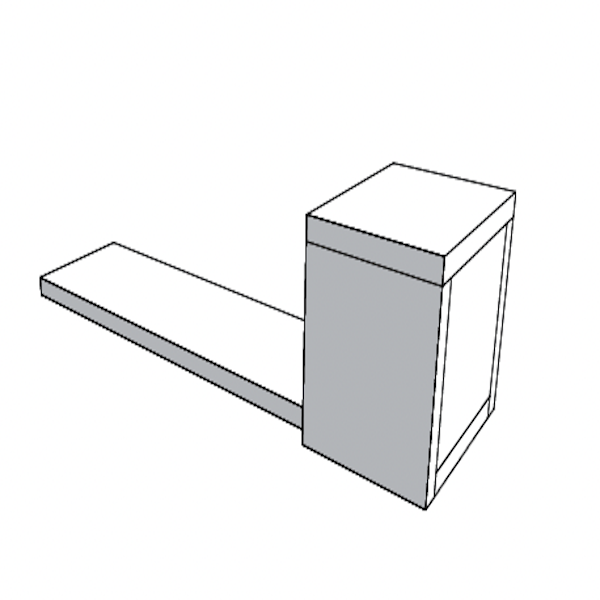
Take (1) side piece and align it to the side of the back and bottom boards. Glue and nail together.
Tools
Brad Nailer
Materials
Wood Glue, 1-1/2" x 18-Gauge Collated Nails
![Step 3](https://2e1293630802db8d0d56-50fcdb1c10e3e49a3d1b0541a2f13b69.ssl.cf1.rackcdn.com/projects/steps/0b91edb86810405faf8d3c4ce2cfee01.png)
Step 4
Repeat Step 3 and attach the opposite side piece. Glue and nail together.
Tools
Brad Nailer
Materials
Wood Glue, 1-1/2" x 18-Gauge Collated Nails
![Step 4](https://2e1293630802db8d0d56-50fcdb1c10e3e49a3d1b0541a2f13b69.ssl.cf1.rackcdn.com/projects/steps/737da5b98c084a958cf61471b6766015.png)
Step 5
Align the front piece to the assembly. Glue and nail together.
Tools
Brad Nailer
Materials
Wood Glue, 1-1/2" x 18-Gauge Collated Nails
![Step 5](https://2e1293630802db8d0d56-50fcdb1c10e3e49a3d1b0541a2f13b69.ssl.cf1.rackcdn.com/projects/steps/299abfbf5cf34844898d320ca1a992ee.png)
Step 6
Fill nail holes and sand. Seal or paint as desired.
Tools
Sander, Sand Paper
Materials
Paint
![Step 6](https://2e1293630802db8d0d56-50fcdb1c10e3e49a3d1b0541a2f13b69.ssl.cf1.rackcdn.com/projects/steps/594751d8f87b416dbac3140eed7ad4b5.png)
Step 7
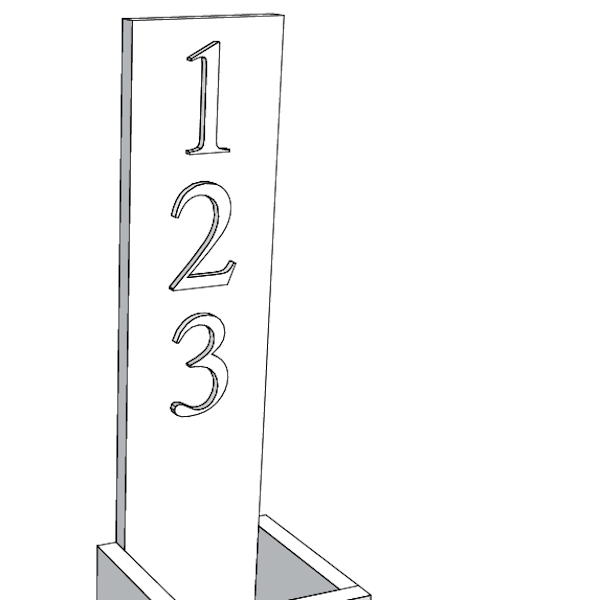
Install numbers to the center of the back board.
Tools
Drill
Materials
4" House Numbers
![Step 7](https://2e1293630802db8d0d56-50fcdb1c10e3e49a3d1b0541a2f13b69.ssl.cf1.rackcdn.com/projects/steps/e1cc4bb38caa425ca1c3079ae7f87989.png)