Steps
Step 1
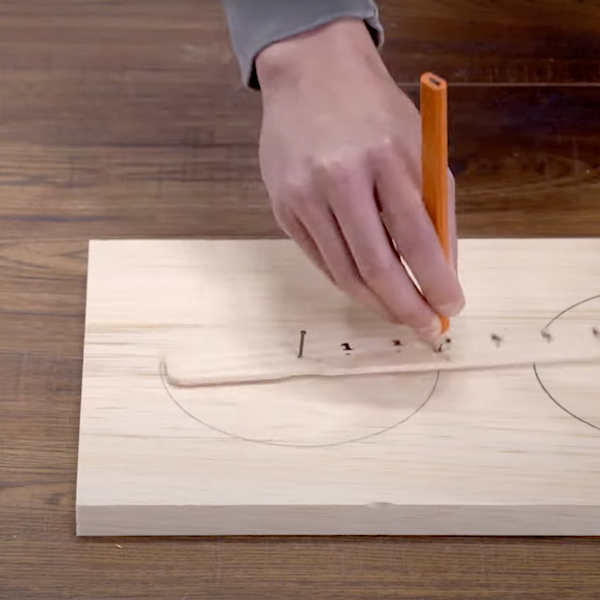
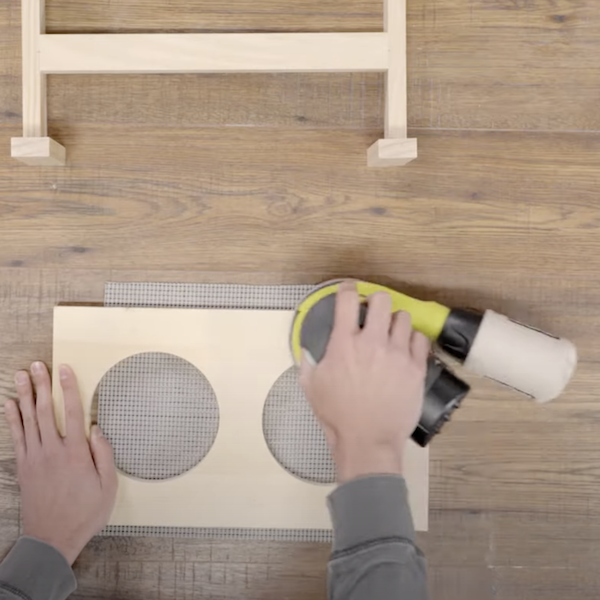
Use the diagram to mark the location of the center of the circles to be cut out. These circles will hold the (2) bowls. Use a drafting compass to draw (2) circles that are 5-1/2” in diameter.
Tools
Materials
Step 2
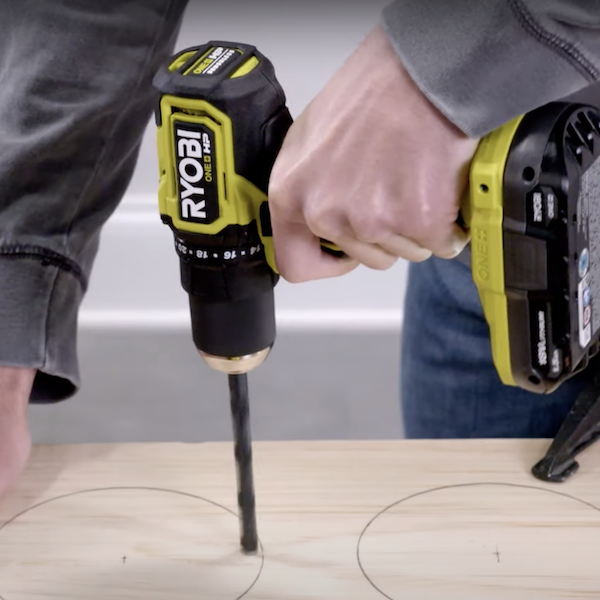
Drill a 3/8” hole within each circle for the jig saw blade to pass through. Use a jig saw to cut out the (2) 5-1/2” circles.
Tools
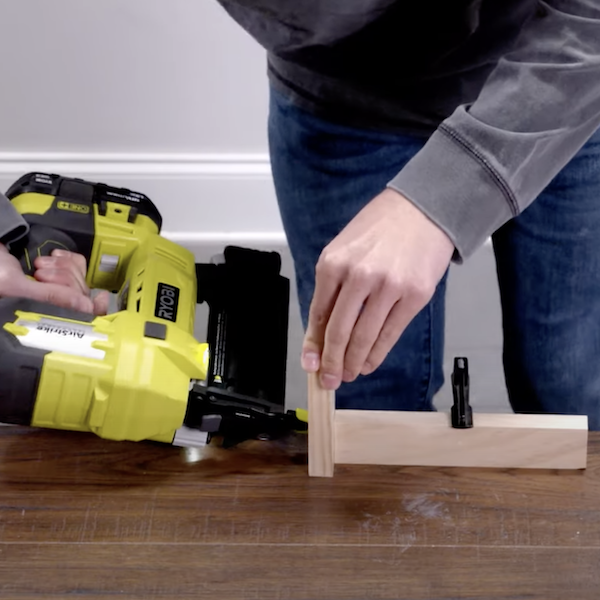
Step 3
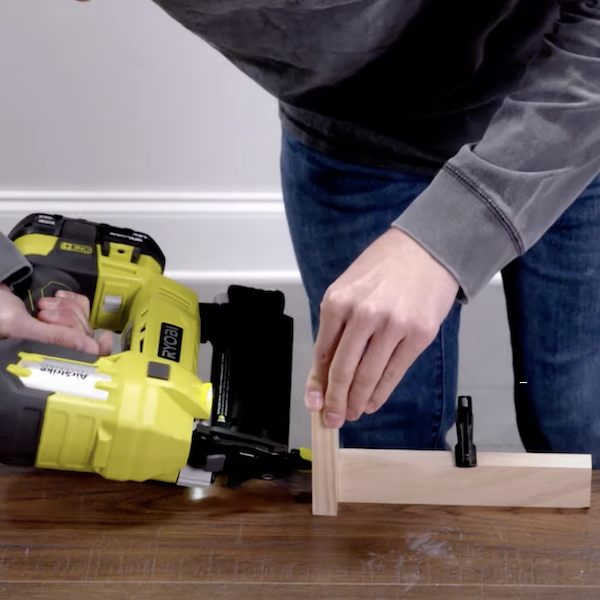
Align (1) 4” leg to the 7-3/4” side stretcher as shown in the diagram. Glue and nail together with a brad nailer. Attach another 4” leg to the other side of the assembly using the same method.
Tools
Materials
Step 4
Align (1) 4” leg to the 7-3/4” side stretcher as shown in the diagram. Glue and nail together with a brad nailer. Attach another 4” leg to the other side of the assembly using the same method.
Tools
Materials
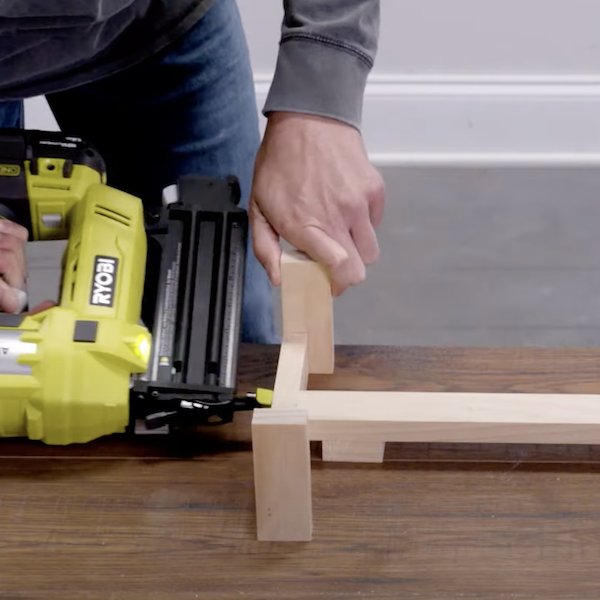
Step 5
Repeat Step 4 to build the second set of legs.
Tools
Materials

Step 6
Find and mark the center line (CL) of both legs. Then find and mark the center line (CL) of the middle stretcher. Align, then glue them together and use a brad nailer to attach both ends.
Tools
Materials
STEP 7
Sand the leg stand and tabletop. Paint or stain both pieces as desired.
Tools
Materials
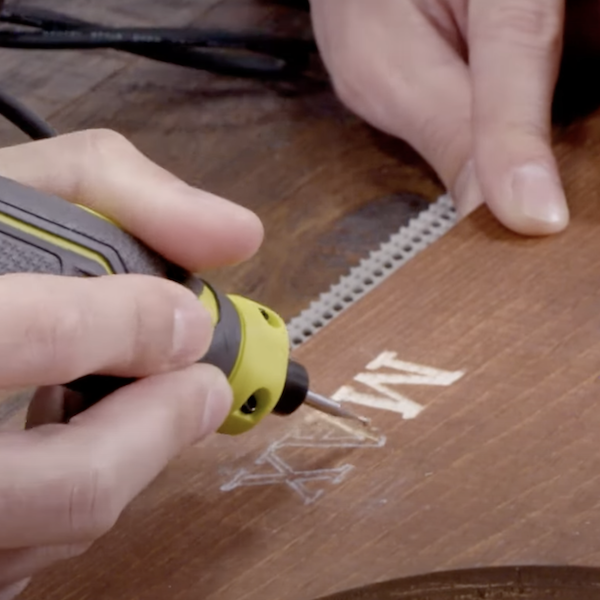
Step 8
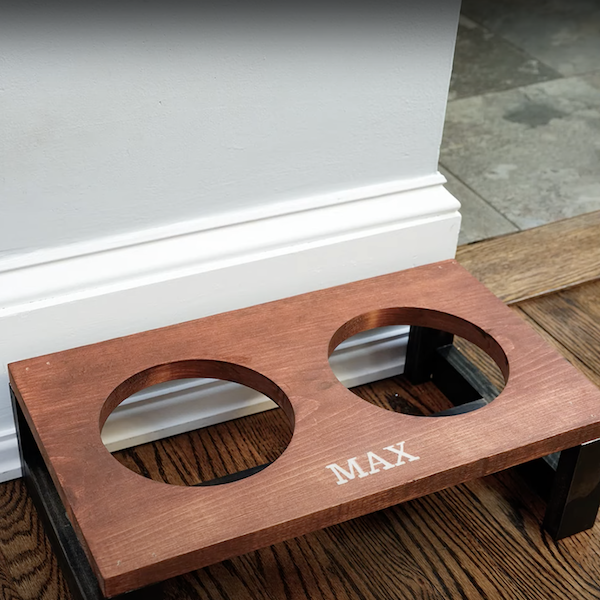
Next, use a template with your pets name. Align the template to the location where you want to engrave your pet’s name and trace on top of tracing paper. Use the rotary tool to engrave the name into the table.
Tools
Materials
Step 9
Attach the top to the legs with glue and brad nails. Finish by putting a few coats of clear sealer over the entire table.
Tools
Materials
Step 10
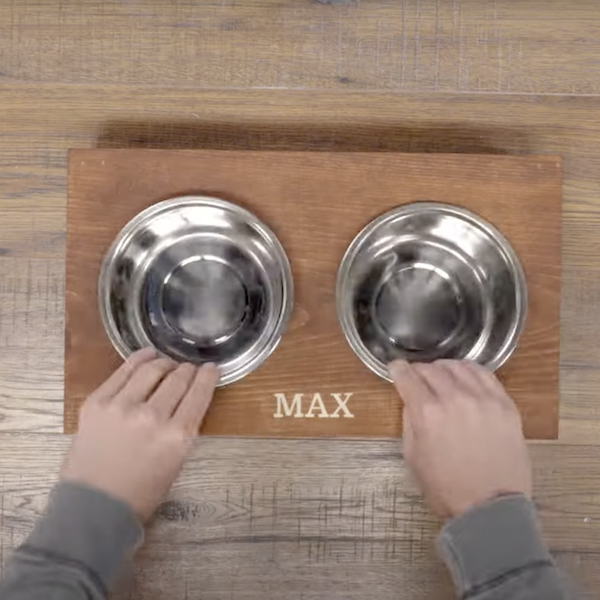
Place the two bowls into the tabletop once it has dried.
Materials