Steps
STEP 1
Cut out all material using the Lumber & Sheet Cut Layout Guide.
Tools
Materials
STEP 2
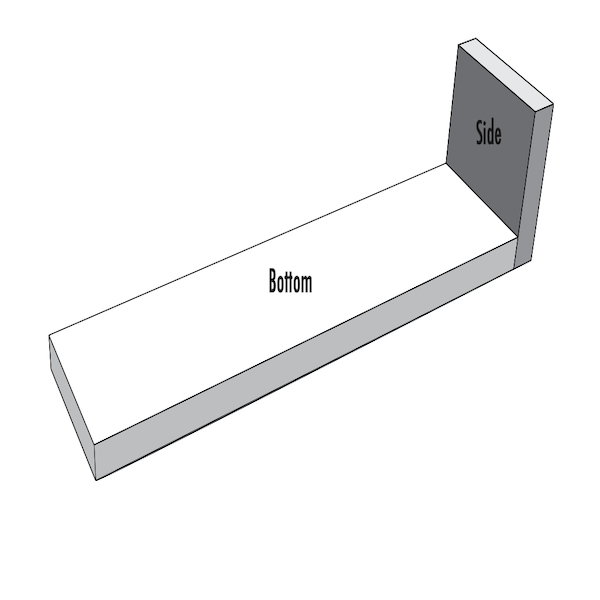
Take (1) of the 14-1/2" bottom boards and align (1) of the 3-1/5" side boards to the end. Glue and nail together.
Tools
Materials
STEP 3
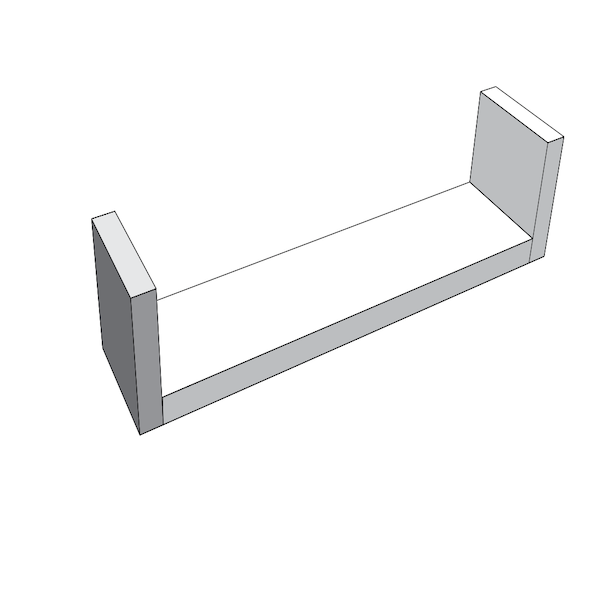
Attach the other side board to the opposite end. Glue and nail together.
Tools
Materials
STEP 4
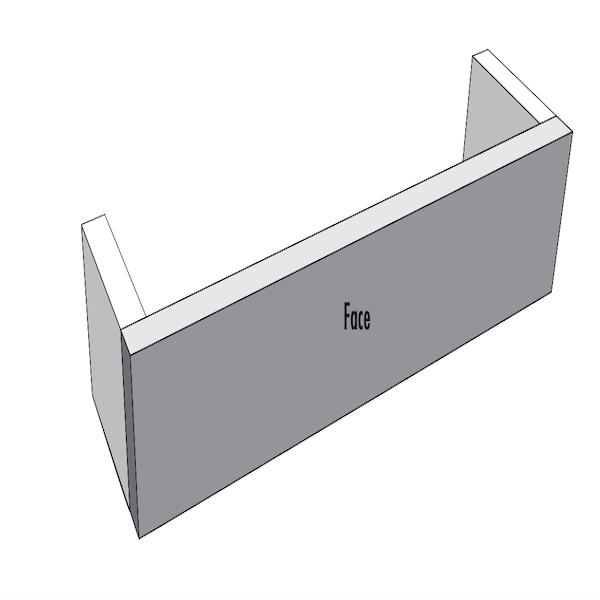
Align the 16" face to the shelf. Glue and nail together.
Tools
Materials
STEP 5
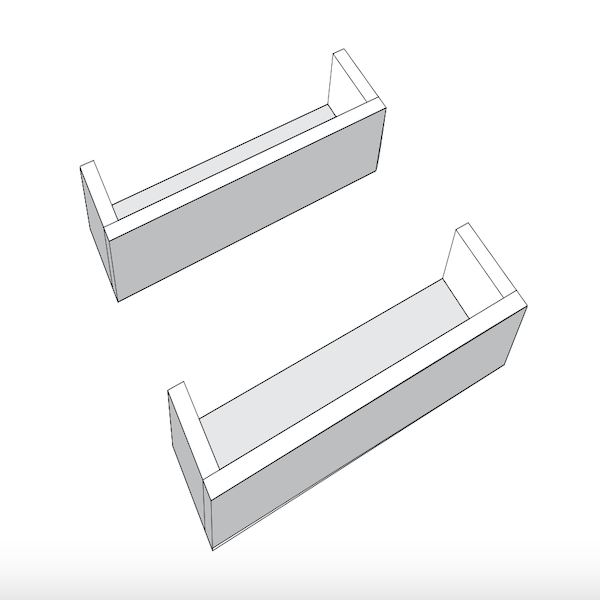
Repeat Step 2-Step 4 to make a second box shelf.
Tools
Materials
STEP 6
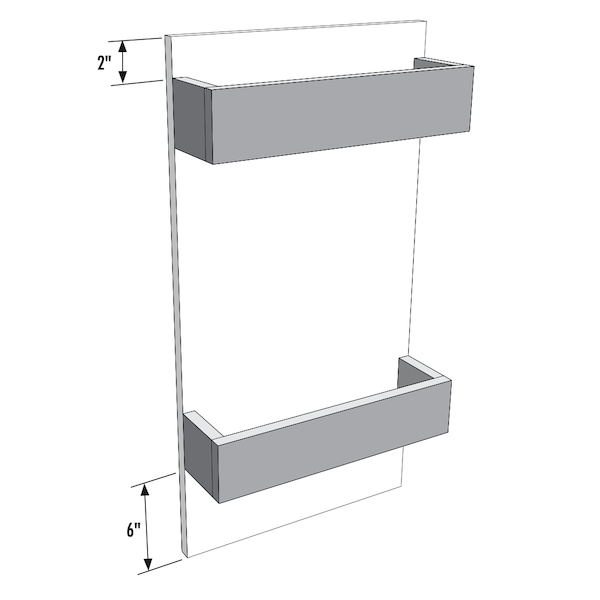
Measure 6" up from bottom of back panel. Mark a line on both sides. Align (1) shelf with lines just drawn. Glue & nail together. Measure 2" downward from top of back panel. Mark a line on both sides. Align other shelf with lines just drawn. Fasten.
Tools
Materials
STEP 7
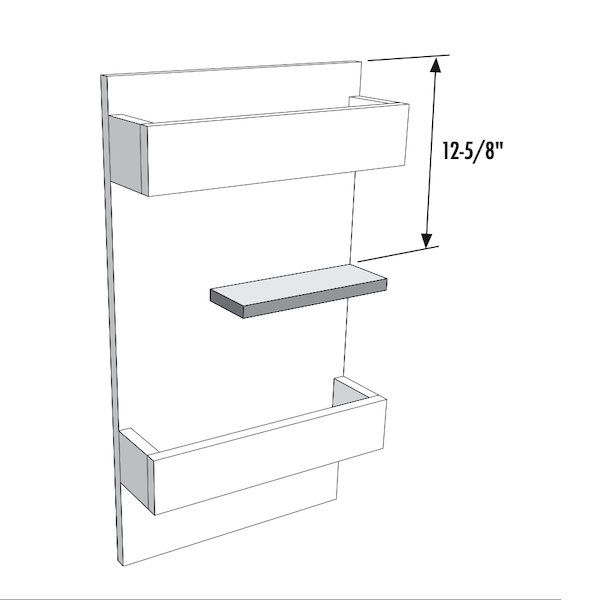
Measure 12-5/8" downward from the top of the back panel and mark a line to (1) side. Align the 10" shelf to the line. Attach with glue and nails.
Tools
Materials
STEP 8
Sand and finish to your desire. Follow sanding tips on page 8.
Tools
Materials
STEP 9
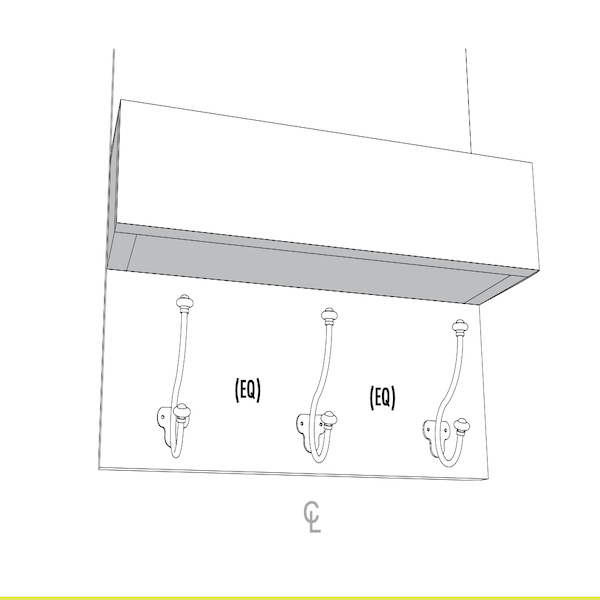
Find the mid point of back panel. Mark a center line a few inches upward from bottom. Align & attach middle coat hook on line. Measure Equal Distances (EQ) from the middle hook to each edge (about 5" to 6"). Attach (2) outside hooks.
Tools
STEP 10
Project complete! Now go make a great first impression with a tidied up entry way! ENJOY!