Steps
STEP 1
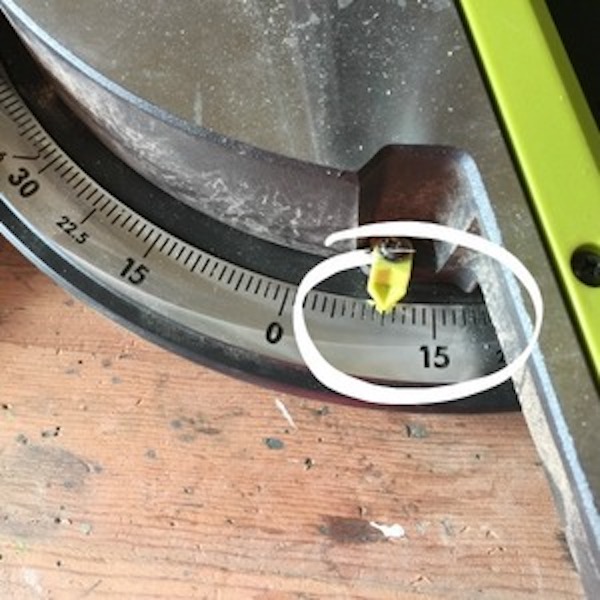
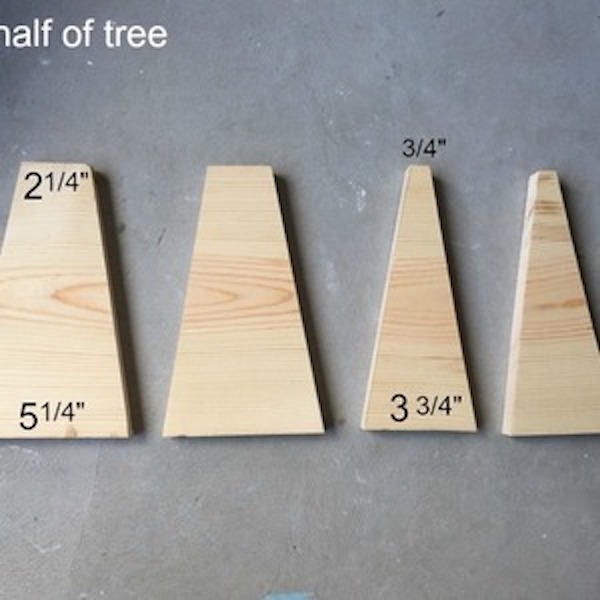
To make all the cuts for this double layer tree, I set my miter saw to 10°.
Tools
![cutting wood to size](https://2e1293630802db8d0d56-50fcdb1c10e3e49a3d1b0541a2f13b69.ssl.cf1.rackcdn.com/projects/steps/146352d3f1d64a61a7de5df0c4a4ba9a.jpeg)
STEP 2
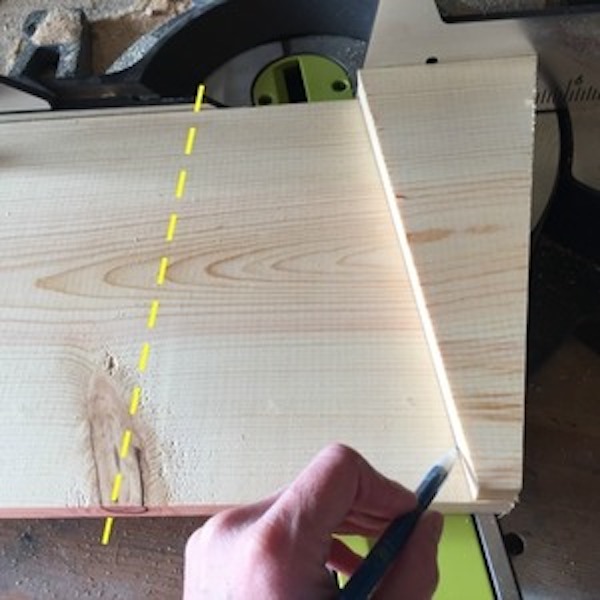
After each cut, I flipped the board over. No need to change the angle on the saw.
Tools
![flipping wood board](https://2e1293630802db8d0d56-50fcdb1c10e3e49a3d1b0541a2f13b69.ssl.cf1.rackcdn.com/projects/steps/8eeb647190d44c2cbae233cc8bb5fc66.jpeg)
STEP 3
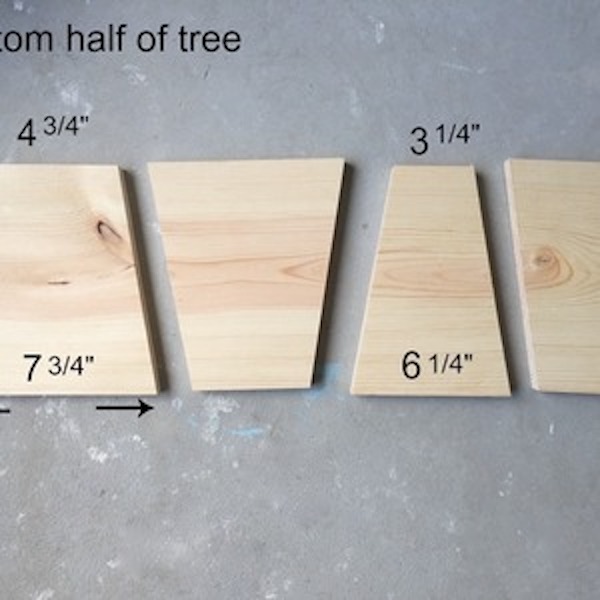
The top and bottom parts of the tree are basically two 4-sided boxes. This means there are 2 sides to each box that are wider than the other two. Here is a photo of the bottom section, with measurements.
![Wood cuts](https://2e1293630802db8d0d56-50fcdb1c10e3e49a3d1b0541a2f13b69.ssl.cf1.rackcdn.com/projects/steps/69384aa2bb57495a8d5decc7e838a73b.jpeg)
STEP 4
Measurements for the top section.
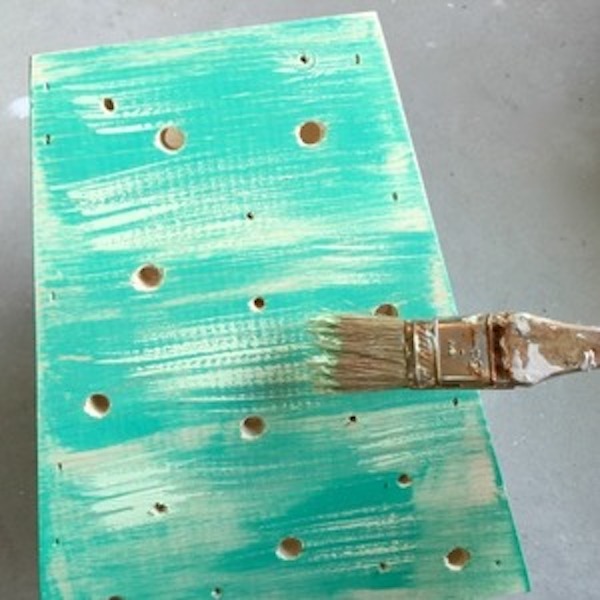
![top portion of tree](https://2e1293630802db8d0d56-50fcdb1c10e3e49a3d1b0541a2f13b69.ssl.cf1.rackcdn.com/projects/steps/b013536a24ff4c1ab16afbcc90338987.jpeg)
STEP 5
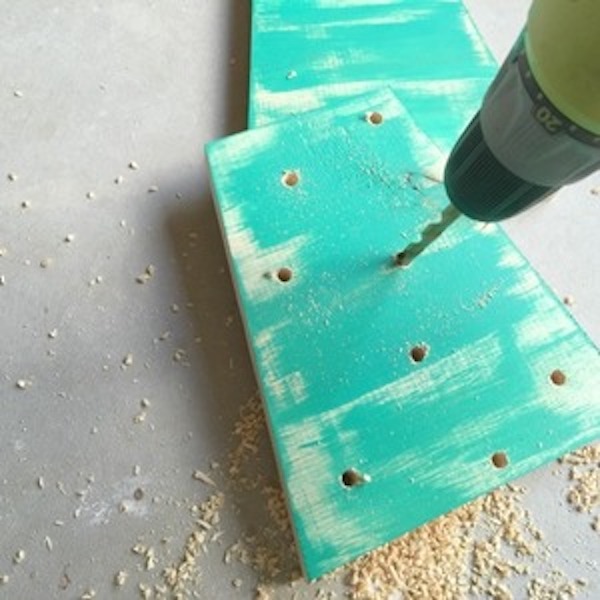
I decided to do a layer of paint before I drilled the holes. (I wanted to avoid having paint collect in the holes, which is what would have happened if I painted it after the holes were drilled.)
Tools
![Drilling holes into the wood](https://2e1293630802db8d0d56-50fcdb1c10e3e49a3d1b0541a2f13b69.ssl.cf1.rackcdn.com/projects/steps/d3714c37ee634483ab2c919a17d10517.jpeg)
STEP 6
Next, I drilled some random holes. I left some space to add smaller holes once I assembled it. I wanted to see it in “tree form” before I committed to all the hole placement.
Tools
![Drilling holes](https://2e1293630802db8d0d56-50fcdb1c10e3e49a3d1b0541a2f13b69.ssl.cf1.rackcdn.com/projects/steps/11760408306045d59d7c4fadb1a68862.jpeg)
STEP 7
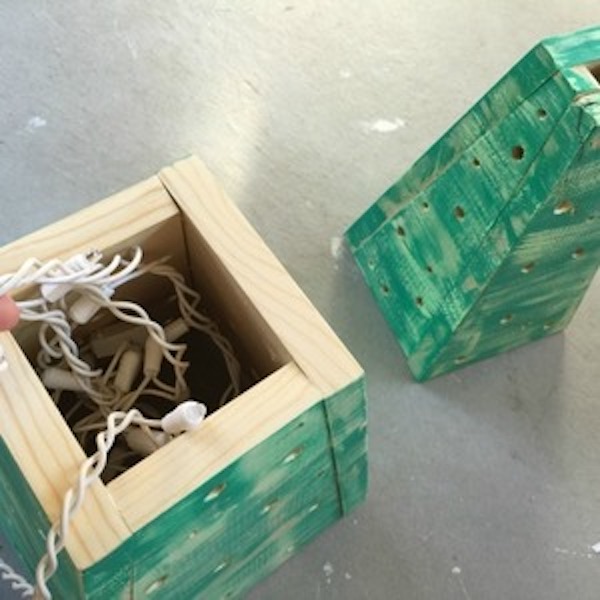
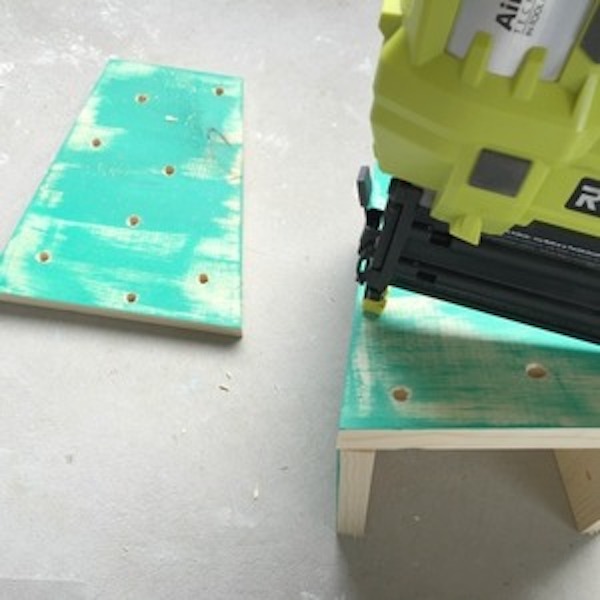
I used wood glue and my Airstrike nailer to assemble the two “boxes”.
Tools
![Nailing boxes](https://2e1293630802db8d0d56-50fcdb1c10e3e49a3d1b0541a2f13b69.ssl.cf1.rackcdn.com/projects/steps/95f6dd05713a43cba09c0946bff44c5e.jpeg)
STEP 8
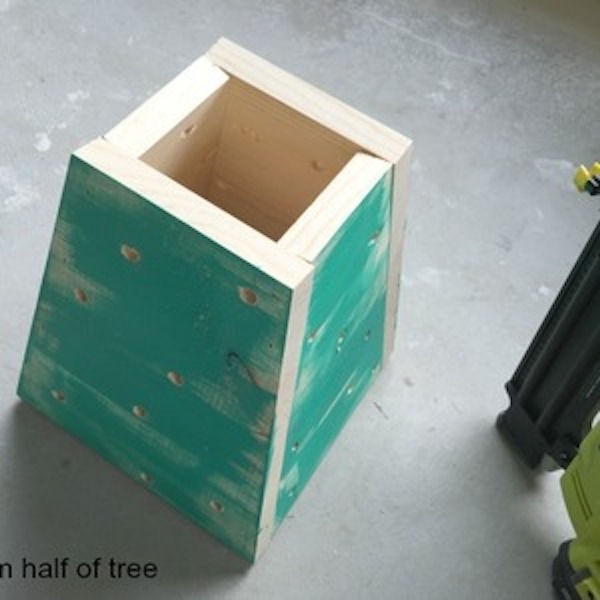
Here’s a look at the bottom section after I nailed it together.
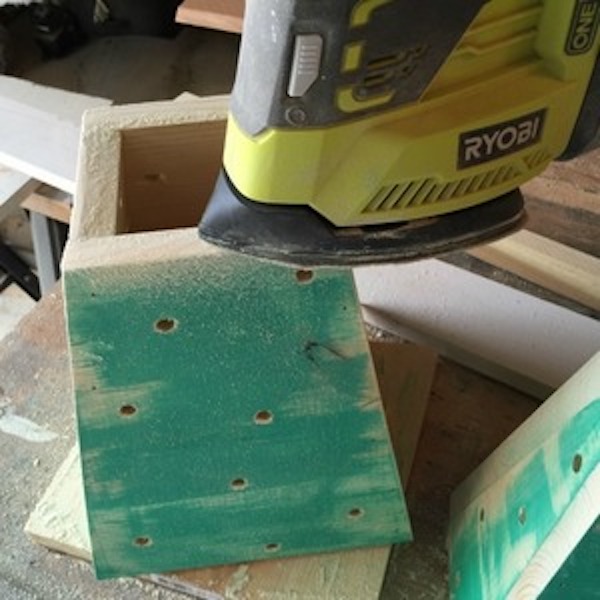
![assembled bottom of the tree](https://2e1293630802db8d0d56-50fcdb1c10e3e49a3d1b0541a2f13b69.ssl.cf1.rackcdn.com/projects/steps/7b4c5661bb10444f918ea43b5cb38c90.jpeg)
STEP 9
There was a tiny lip on the top edge thanks to the taper, so I just sanded it down.
Tools
![Sanding top of tree](https://2e1293630802db8d0d56-50fcdb1c10e3e49a3d1b0541a2f13b69.ssl.cf1.rackcdn.com/projects/steps/c0c8fc9792184792b857c7afaf1479db.jpeg)
STEP 10
Next, I added some smaller holes.
Tools
![Drilling smaller holes](https://2e1293630802db8d0d56-50fcdb1c10e3e49a3d1b0541a2f13b69.ssl.cf1.rackcdn.com/projects/steps/b5f41a41ff144235b597a30731ddbda6.jpeg)
STEP 11
Then, I added some lighter green paint to give the illusion of distressing.
![painting the tree](https://2e1293630802db8d0d56-50fcdb1c10e3e49a3d1b0541a2f13b69.ssl.cf1.rackcdn.com/projects/steps/c5d0d6fd6d544b2a9422152bc4b44cbd.jpeg)
STEP 12
To incorporate the light up feature, I simply added a strand of LED Christmas lights inside, then placed the top onto the tree. (I used LED lights, because they do not get hot like the traditional ones.) Now I have a little light up holiday tree!
![Adding lights](https://2e1293630802db8d0d56-50fcdb1c10e3e49a3d1b0541a2f13b69.ssl.cf1.rackcdn.com/projects/steps/699b55a8b63d47da8fede9be2aecc587.jpeg)