Steps
Step 1
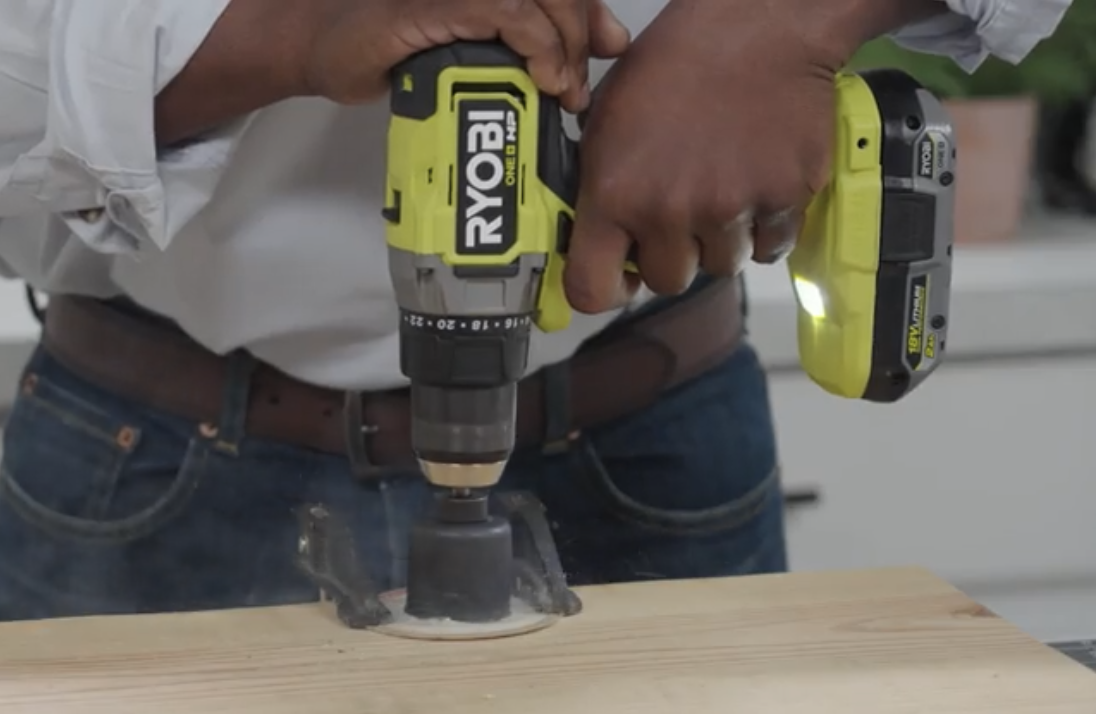
Firmly clamp down the lid of a mason jar and drill a hole with a hole saw. Ensure the hole size matches the lightbulb receptacles on the lamp wire. Repeat for as many lights as you plan to have on the finished light.
Tools
Materials
Step 2
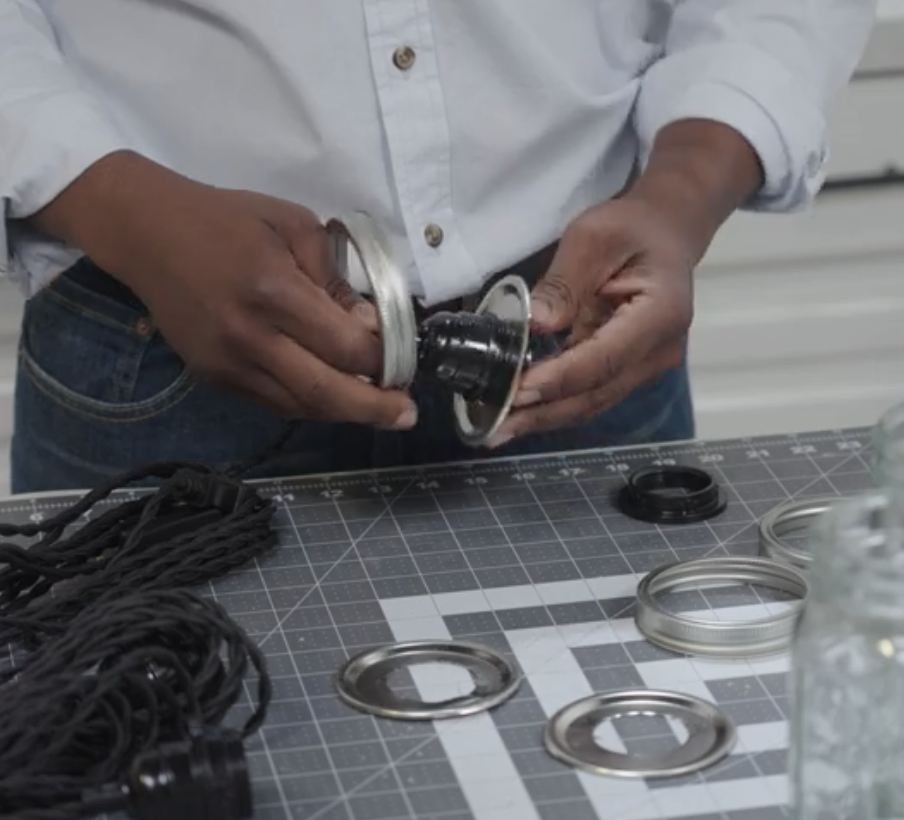
Secure the lids of the jars to the lightbulb receptacles on the lamp wire.
Materials
Step 3
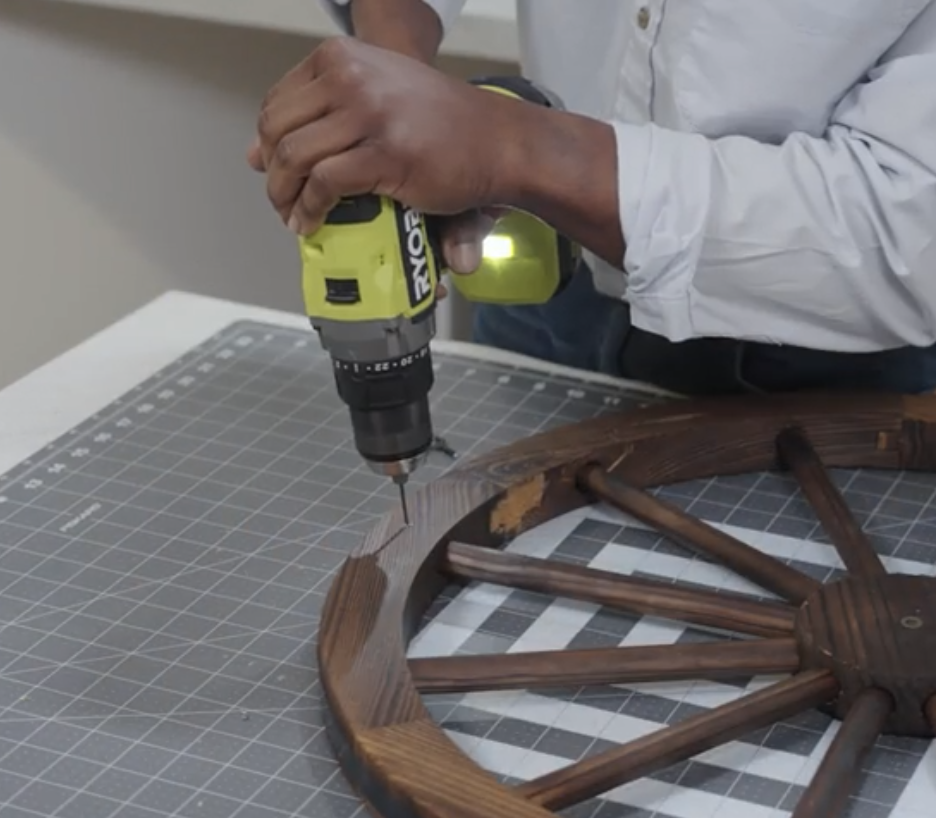
Pre-drill holes in the top of the wagon wheel for the eye screws. Screw in screws by hand.
Tools
Materials
Step 4
Trim chain to desired length. You will need three shorter chains to connect from the wheel to the main hanging chain, which is used to hang the light from the ceiling. Attach to eye screws and main hanging chain using quick link carabiners.
Tools
Materials

Step 5
Weave the lamp wire into the chain securely and wrap the ends around the wheel spokes so the lights will hang down at different lengths. Screw in lightbulbs and screw in mason jars around the lightbulbs.
Materials

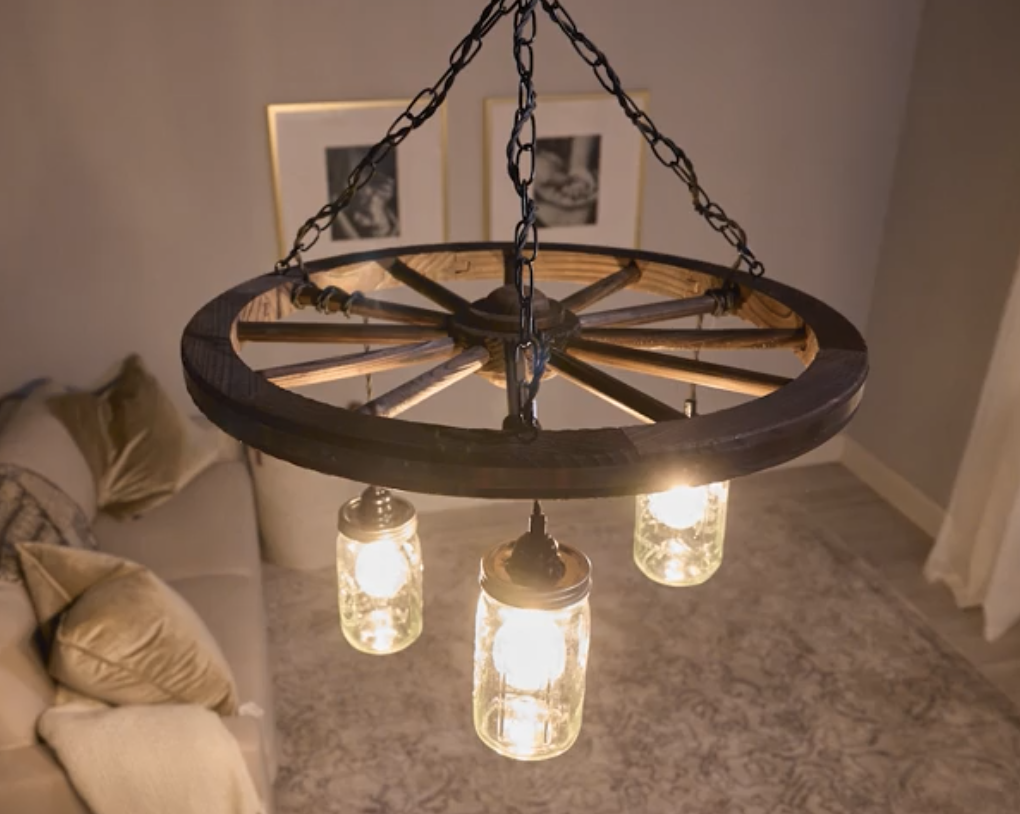
Step 6
Hang light from ceiling. Ensure safe practices when working with electricity – always consult a professional.