Steps
step 1
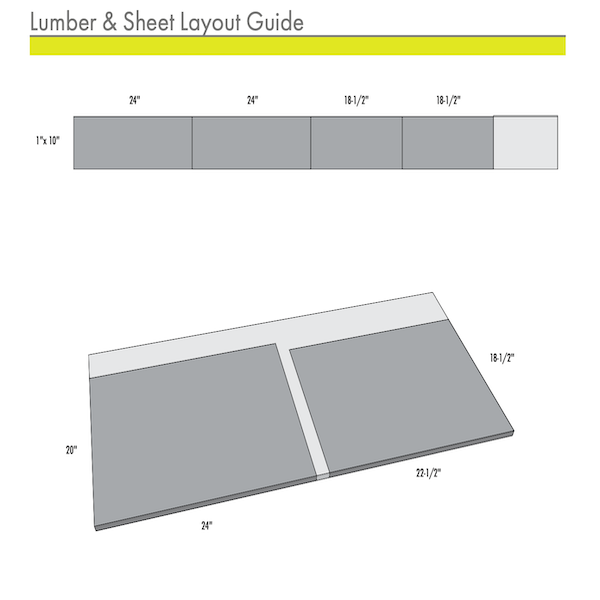
Cut out all material using the Lumber & Sheet Cut Layout Guide.
Tools
Materials
step 2
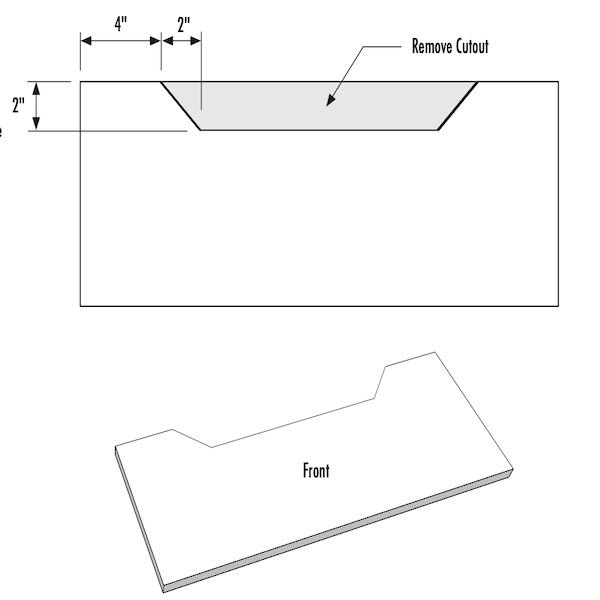
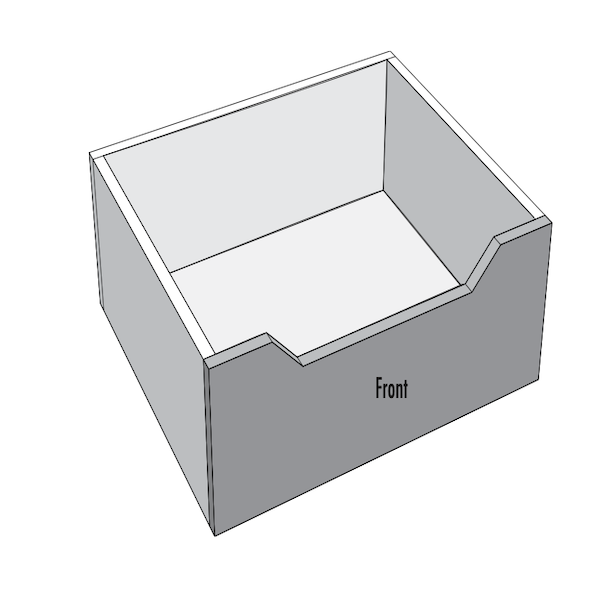
Mark the location for the lid cutout using the diagram. Both sides are symmetrical. Use a jig saw to cut out and remove this section.
Tools
Materials
step 3
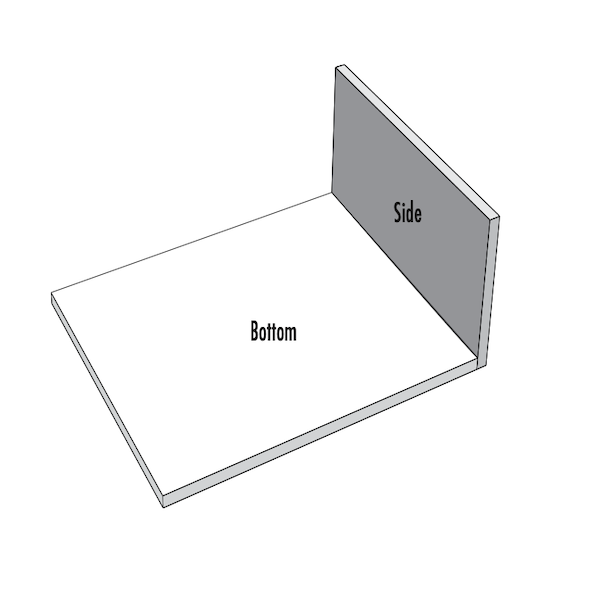
Attach (1) side to the bottom panel with glue, then secure using a brad nailer. Place brad nails every 2 inches.
Tools
Materials
step 4
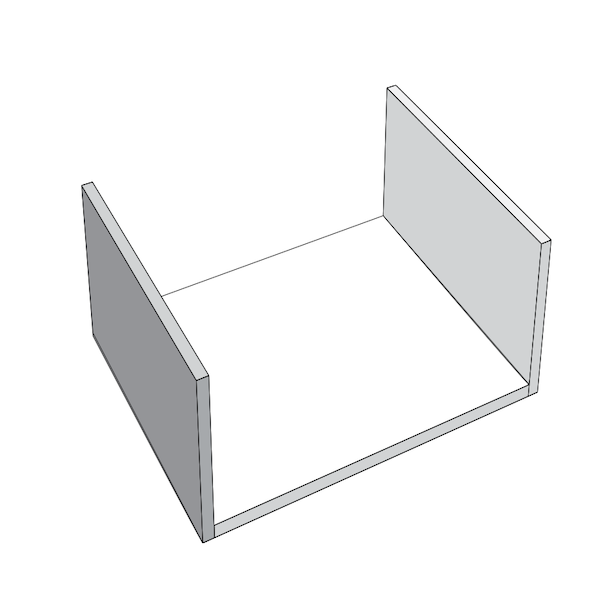
Use the same method from Step 3 to attach the opposite side panel.
Tools
Materials
step 5
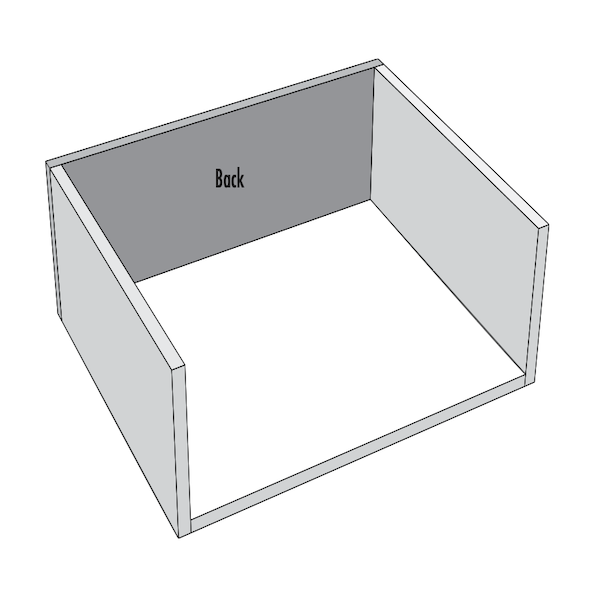
Use the same method from Step 3 to attach the back panel.
Tools
Materials
step 6
Repeat Step 5 to attach the front panel.
Tools
Materials
step 7
Sand the toy box and the lid. Refer to the sanding information on the bottom of Page 8 of the project plan PDF. Apply finish coat as desired.
Tools
Materials
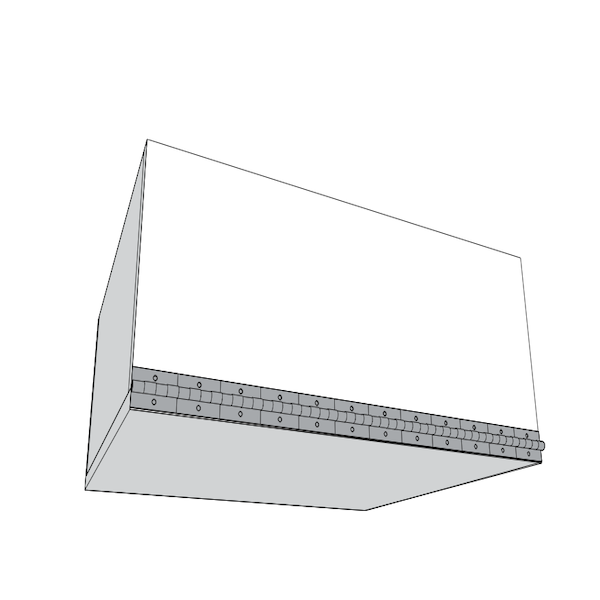
step 8
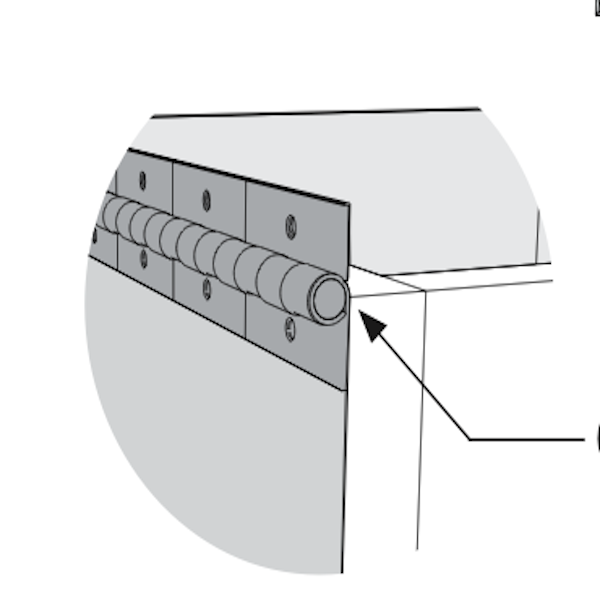
Align the piano hinge to the back of the top edge of the toy box. Center the hinge barrel to the edge of the box. Install as hinge instructions recommend.
Tools
step 9
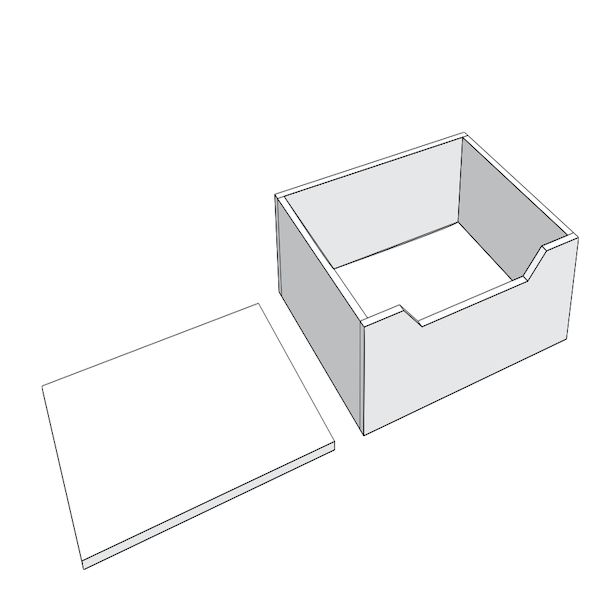
Attach lid to hinge.
Tools
Materials
step 10
Screw in (1) of the eye screws about 5” from the back and 1” down. Attach (1) end of the jack chain. Swing the lid open just past 90° to where you want it to fall backwards. Extend the chain to that point on the lid and attach chain.